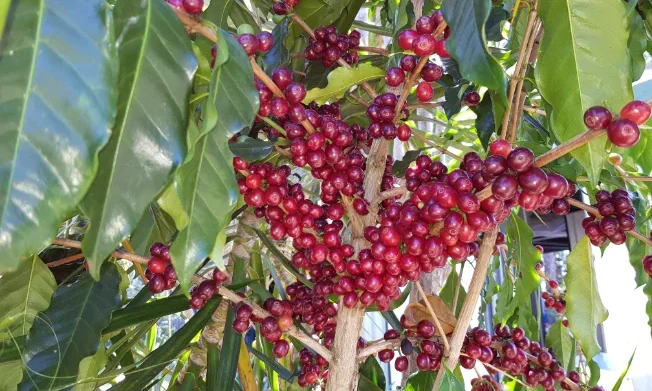
It’s always exciting to catch a glimpse of the first red cherry for the season; the promise of a new vintage and what surprises it might hold. But if you pick coffee, the clock starts ticking. It can only sit around for a few hours before it starts to ferment. For most growers picking and pulping happen on the same day.
Picking coffee
Use both hands. Holding a bucket in one hand and picking with the other is the wrong way. There are commercial fruit baskets available but I just wear a plastic bucket on a belt. I have a second bucket handy to empty the one on the belt in to.
Under-ripe coffee starts green, then turns pale, yellowy-orange, then pale red. For the best flavour coffee cherries should be a deep red colour all the way to the stem, almost purplish. Ripe cherries are slightly soft to the touch and come away quite easily. There are varieties that are yellow and orange when fully ripe but I just grow red ones because I think it’s a little bit easier to tell when they are ripe. Under-ripe coffee means lower quality.
You’ll be back to each plant several times so be patient and just cherry-pick them as they fully ripen in turn. Reject any that are turning brown. Come back through in a week or so and repeat.
Processing Coffee at Home: the terminology
You’ve picked a bucket of ripe coffee, now what? There are several processing methods to follow and some confusion because of different terminology. I’m going simplify it to the to: the dry method, the wet method and the honey method. There are variations but most fall into one of these broad categories. There are several layers to remove before a coffee bean can be roasted. Each method tackles the layers in slightly different ways.
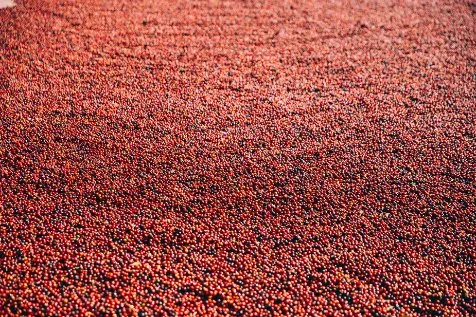
The Dry Method
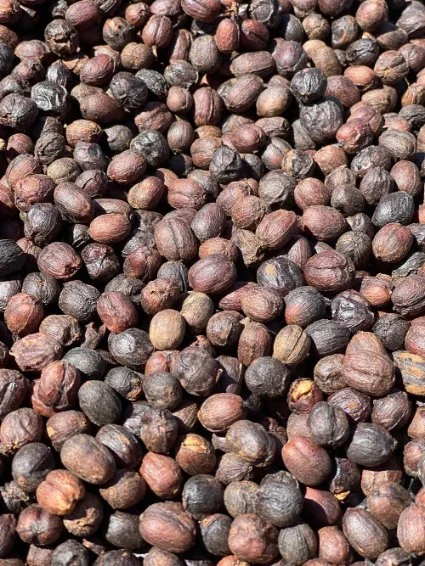
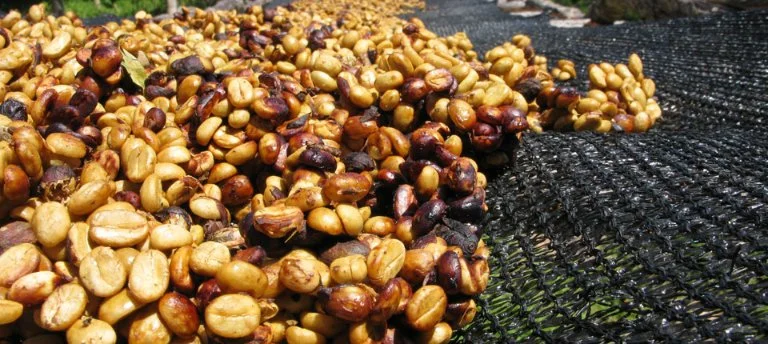
The dry method is easy: you just spread the picked cherries out whole on concrete or a tarp to dry. Turn them often, especially during the first few days. You want to dry off the skins quickly so they don’t go moldy. After a couple of weeks they go hard and dry and brown and you can safely store them. Dried like this they are referred to as ‘naturals’. The dry method can result in interesting, fruity flavours imparted by the skin and pulp fermenting on the beans as they dry.
Pulping – Removing the skins
The skins are easier to remove when they are fresh and soft. With both the Wet and Honey methods, the skins are removed before drying.
The Wet Method – Removing the Mucilage
Removing the skins doesn’t remove the thin layer of flesh, known as mucilage, still stuck to the beans. The wet method removes the mucilage. On larger farms the mucilage can be agitated off mechanically but it can also be removed by immersing the pulped beans in water for a number of hours to ferment. They are then rinsed clean and spread out to dry. Most of the world’s coffee is processed like this. It’s by far the easiest way to get a predictable, reliable product.

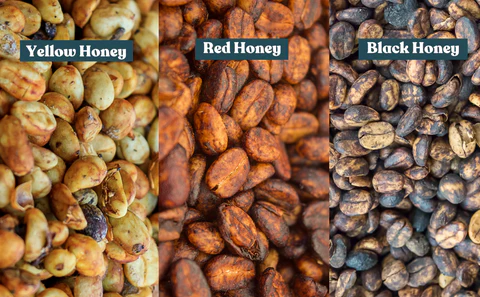
The Honey Method
If the skins are removed and the mass of pulped beans are spread out to dry with the mucilage still attached; this the honey method. As the mucilage slowly dries on the bean it ferments and goes a yellowy colour, hence the name. Honey is the trickiest method. Because the mucilage is sticky and damp the beans are difficult to separate and mix around. This makes drying evenly very important. They must be turned frequently and for longer to prevent spoiling.
The Pulper
(Cue theme music from ‘2001: A Space Odyssey’). The pulper virtually eliminates this tedious, laborious job. It’s orders of magnitude easier and faster. Just pour buckets of fresh cherries in the top, watch the beans magically come out clean and the separated skins drop into a bucket.
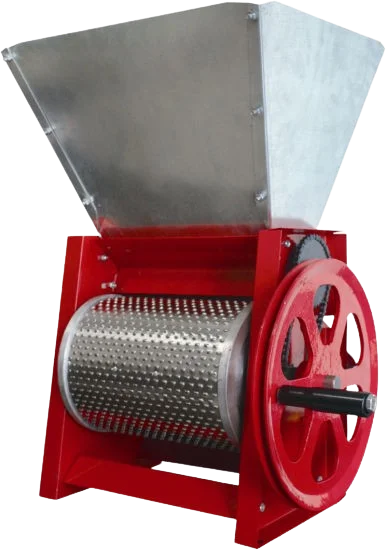
Hallelujah. It really is the difference between a few cups of novelty, home-grown coffee and a year long supply. Taking out this tedious step enables home-grown coffee to become an enjoyable, rewarding hobby.
I have it mounted on an old chair frame with salvaged golf cart wheels to move it around. This bad boy comes with a hand crank and works amazingly well and that’s what I did for a few seasons – crank – but I always had the idea of motorising it. Turns out an electric cement mixer motor bolted to a work bench and fitted with a belt works like a charm. I just relocate the motor during the picking season.
I love my pulping machine. All I need to do is pick out the few skins that aren’t separated. It is a substantial investment but it means I can easily pulp a whole years supply and motorised; you could run a coffee farm with it. The whole kit pays for itself in delicious coffee in less than a season.
We’ve spread some off the crop out to dry as naturals and pulped the rest of our freshly picked cherries. In the next post I’ll dive deeper and explain step by step how to process the pulped fruit, just like millions of tons of coffee is processed every day around the world, some into washed and some into honeys.